A picture is worth a thousand words. Though the saying may be cliché, when it comes to sharing your work and featuring your custom cabinetmaking abilities, good pictures can be essential to selling your next job. Each project you complete is unique and photos of your projects will give you a way to show future clients different options and upgrades.
 Photograph once homeowners are settled in
Photos of homes without occupants moved in seem to lack the personal feeling that clients will connect with when viewing your work. This is especially true for homes with lots of Glass or French Lite doors where the contents can be seen so you don’t have a bunch of empty cabinets. In the end though, if the homeowner doesn’t want you coming back to photograph, then it is better to have a photo right before someone moves in than no photos at all.
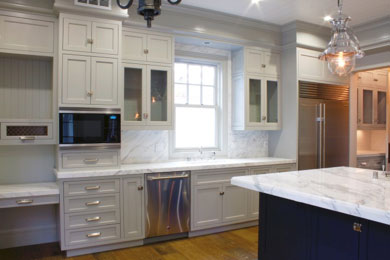
Empty Glass and French Lite cabinets feel lacking and distract from your beautiful work
 Get some sun
Try to take the photo during the day when sunlight is good to try to minimize the need to use the flash. Natural sunlight is a beautiful lighting source and works great when the interior lights (and under cabinet lights) are also on.
When working in low light conditions always use a tripod! Everything looks great on the dinky screen on the back of you camera, but there's nothing worse than getting home, downloading your photos, and realizing that your perfect shots are out of focus. Using a tripod cuts down on blur and allows you to shoot at slow shutter speeds, which allows you to use as much natural light as possible.
 Keep it clean and let them focus on what’s important
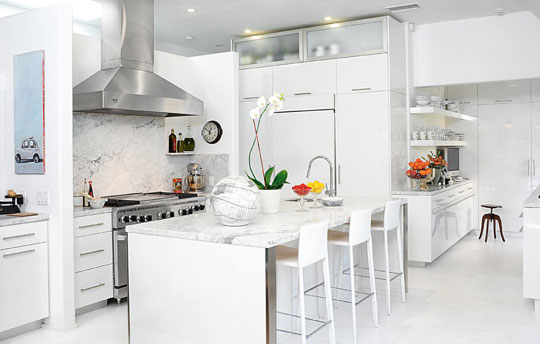
Clean off the counter tops of most items, particularly anything small or visually distracting. This includes phone chargers, soap dispensers, salt and pepper shakers, small knick knacks, dish towels, and paper towel rolls. Also, 9 out of 10 times it is best to roll up any floor mats or rugs and move them out of the picture. A cleaned up space makes it easier for future clients to focus on your work and how your design might work in their space.
 Add a little color to make it pop
Consider bringing some fresh flowers to bring a pop of color and freshness to the image. It’s also a nice leave behind to thank your clients for their business and for allowing you to photograph. A simple monochromatic arrangement looks classy and beautiful. They don’t have to be expensive arrangements from a florist, just something simple to add color.
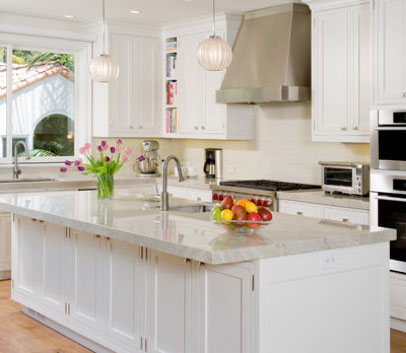
Basic flower arrangements and/or fruit in a bowl can bring a nice pop of color.
View Gallery
 Stand back and take it all in
Stand back and get an overall picture of as much of the space as possible. Try to photograph from as many different angles as possible, for instance, all 4 corners of the room. Be mindful of avoiding your own reflection in windows and appliances.
Use as long a lens as space will permit. Avoid using too wide a lens as this often leads to an unnatural, distorted view. If space is really limited, you might have to consider stitching several photographs together.
 Watch your angles
Typical eye height is very appealing. Try to keep you camera's lens perfectly level. Shooting at extreme angles distorts the view and one of your goals should be to try and keep vertical lines going straight up and down. Raised angles that look down on a room can be disorienting and may distract from the overall goal. Sometimes low angles are the only way to capture small rooms like bathrooms, laundry rooms, or details of lower cabinets.
 Feature the details that make the project special
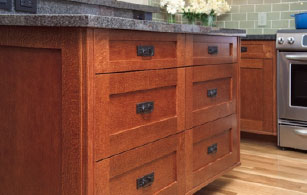
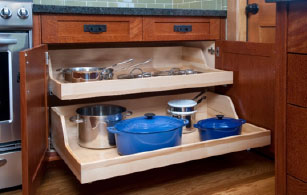
Once you have good overall room pictures, move in closer and take shots of details that draw interest. This is a good opportunity to feature some upgrade options like large pull out drawer boxes, special organization options, appliance storage areas, and ornamental cabinetry details.
|
Drawer Bank with surrounding items |
Detail shot of pull out drawers |
Do you have a project that would great for professional photography to be featured in Decore-ative Specialties literature and web site? Contact us with details of your company name, project, and basic snapshots of the room. We just may coordinate sending out a team to photograph your work and provide you with free professional images for your own use. If you already use a professional photographer to capture your work and would like to see your work featured by Decore-ative Specialties, please contact us at info@decore.com.
Featured Article
A key figure in the success of Decore-ative Specialties has been the leadership of Jack Lansford, Jr. in the expansion of its products and capabilities, which in turn has influenced the custom cabinet market.
Categories
Recent
-
Celebrating Milestones: Micaela Maldonado Retires After 38 Years!
On June 11th, 2026, Micaela Maldonado retired from Decore-ative Specialties after 38 years.
-
Celebrating Milestones: Salvador Gonzalez Retires After 45 Years!
On November 7th, 2025, Salvador Gonzalez retired from Decore-ative Specialties after 45 years.
Popular
-
New Catalog and Pricing Guide!
We recently released our newest wood catalog and pricing guide! Combined with artistic photography and industrial design, our wood catalog provides over 200 pages of the most comprehensive product offering in the custom cabinet components industry.
-
WMIA 2016 Innovator of the Year
Decore-ative Specialties’ use of a custom CNC shaper sander has significantly increased capacity and improved production in its cabinet door making process.